As an author, I can’t tell you how many people have told me, “I have a great idea for a book!” But did you know that only 3% of writers see that spark through to fruition?
It’s definitely no easy feat, and I think the biggest issue people have is knowing where to even begin.
So, how do you do it?
How to start writing a book in 13 simple steps:
- Come up with a solid story
- Write down everything you know about the story
- Come up with biographies for your main characters
- Establish how you want to present your story
- Outline your chapters, including any twists and the climax
- Set up a distraction-free workspace
- Work out a writing schedule
- Write a rough first draft
- Fill in details and polish the writing in the second draft
- Find beta readers and collect feedback
- Make revisions and needed edits
- Edit, edit, edit
- Publish your book on Amazon’s KDP
If you’re new to the writing world or took a little break and feel a bit rusty, you’re in the right place. Writing is pretty subjective, and no two writers will work in the same way. But I’ve put together this list to share with you what works for me when it comes to writing books, in the hopes it can work for you, too.

1. Come Up With a Solid Story
It goes without saying, but you probably won’t get too far if you don’t have a solid story.
However, that doesn’t mean you need to know absolutely every detail about your story to start writing.
Generally speaking, there are two main types of writers:
- Pantsers like to sit down and let the story write itself. They will have a few ideas in mind, but they won’t do too much planning overall.
- Plotters prefer to lay it all out, chapter by chapter, start to finish. The level of planning differs, but it’s usually a solid amount, including any plot twists and the climax.
There’s no right or wrong way to start writing a book, but if you’re new to storytelling, you may find it easier to plan some things out before you start on the meat of the writing.
With that in mind, I’m going to continue with this article as a plotter would. If you’re a pantser, skip to number six!
2. Write Down Everything You Know About the Story
This step isn’t about writing a detailed outline of your whole book. Instead, it’s about getting your ideas on paper before you forget them!
Ask any author, and they’ll tell you the same thing - carry a notebook and pen and write everything down asap! You’d be amazed at how quickly you can lose an idea because you waited until you got home from work.
So, once you have a general story idea, sit down and write out everything you can think of. That may include:
- Where you want the story to be set
- Who the protagonist is
- What conflict they face
- The overall themes and genre
- Little details about your main character that will make them unique
3. Come Up With Biographies for Your Main Characters
Your characters are the heart of your book, so it’s crucial that they speak to your audience. The last thing you want is a flat protagonist with no personality or redeeming qualities.
So, how do you ensure your characters jump off the page?
Give them a backstory!
This doesn’t have to be a backstory you describe in your book, but just knowing specific details about them will help you write them better. You’ll see their reactions and know what they would say because you know them on a deeper level.
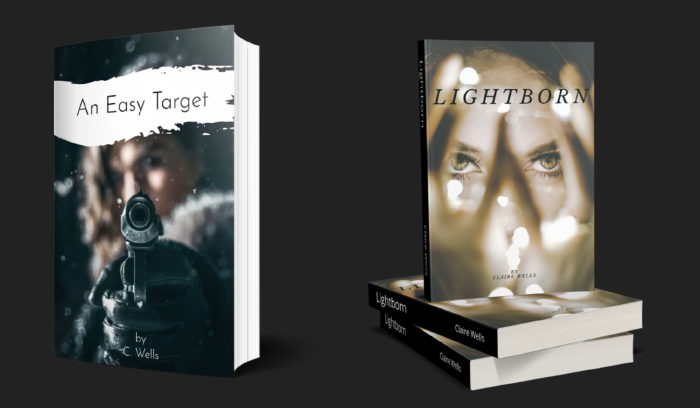
For example, one thing I did before I started writing An Easy Target was to come up with a facts sheet about my main character, Grace. Though I pantsed my way through the writing process, I did have key ideas about her that I wanted to come across.
Here’s how that looked:
- She’s tall, but not too tall with a muscular build - I hate when women in books and movies have spaghetti arms but can knock out a big guy in one punch!
- She has a simple go-bag full of essentials, including black yoga pants and T-shirts, sneakers, boots, and some “everyday clothes” to fit in.
- She doesn’t wear heels or skinny jeans and low-cut shirts. She wears sneakers so she can run when needed and steel-toed biker boots to kick better.
- She carries brass knuckles to add some extra strength to her hits.
- She’s well-trained but not the cliché ex-navy seal.
- She’s not damaged or living with PTSD. She does her job because she gets paid, and she can.
- She’s not above killing people and is good at it.
I wanted her to come from a place of logic but still have a heart. Knowing all of this made her easier to write when it came to dialogue and her reactions.
The same can be said of your antagonist. What’s motivating them? Why are they so intent on doing whatever it is you have them doing?
It’s not enough to just make them evil. There has to be a reason behind it.
4. Establish How You Want To Present Your Story
This is one’s a little tricky. I’ve used first, and third-person POV in my books, and I like both. But I do find third to be a lot easier to work with.
First Person vs. Third Person POV
Generally, there are three main POV (points of view) that you can go with:
- First-person POV: In this case, the main character tells the story, and they will use “I” throughout. This is a great way to add depth to your characters because you can give the reader a glimpse into their inner thoughts.
- Second-person POV: This POV is not typically used in novel writing as it involves using “you.” For example, “you wanted to meet the man of your dreams, but you wound up alone in the dark.” It’s not used because we don’t often tell stories from the reader’s POV.
- Third-person POV: This is probably the most common and is the easiest to write. Here, you would use “he/she/they” to tell the story. It is still possible to write inner thoughts and provide depth with this POV; you just have to be a touch more creative.
I would argue that you’ll choose between first and third-person POV when you write, and it’s really about what you feel comfortable with.
Can you switch between points of view in your book?
You’re the author - you can do whatever you want! It just has to fit together.
In Lightborn, I have some back and forth going on in the story, giving the reader a glimpse into the future until the two stories catch up in the middle of the book.
To help the reader differentiate between these two times, I used first-person POV for the present and third-person POV for the future. My idea was to allow the reader to get close to my character in the present but feel nervous in the future chapters.
When choosing between the two, you need to decide how you want to be a storyteller. One sentence might not look too different when looking at it with a different POV, but it will heavily alter the narrative as a whole:
- “But she was being chased by one of the Three, and her Light was all she had. If she could just catch him off guard, maybe she stood a fighting chance.”
- “But I was being chased by one of the Three, and my light was all I had. If I could just catch him off guard, maybe I would have a fighting chance.”
Past or Present Tense?
The next thing you need to worry about is the tense you want to use.
I’ve heard many authors say sticking to one tense is tough, and I wholeheartedly agree! I’ve read over drafts where I’ve somehow managed to switch between tenses on one page!
The truth is, writing in the past tense is easier. At least, I think so. You have more freedom, and I think it’s more natural.
Many writers like to use the present tense as they believe it adds more tension. However, it can fall flat if your writing isn’t rich enough.
Fight scenes can be especially tough to write in the present tense, and I’ve seen many wind up being simple short sentences thrown together without any ebb and flow.
In my opinion, you should try to stick to the past tense. It’s the easier option, and it’s what readers are used to. It also allows you the freedom to move around in time and add different aspects to your story without anyone getting confused.
Not too many people write in the future tense. I don’t think I’ve ever seen it, and I doubt it would work too well. Best to stick with the basics!

5. Outline Your Chapters, Including Any Twists and the Climax
Once you have your characters thought out and the details in place, I highly recommend going through your story and breaking it up into chapters.
Picture it like a movie with different scenes: if this happens in chapter one, what would come next?
You’d be surprised at how much this can help, and as you work through what is almost like a first draft, you’ll be able to fill in bits and pieces as you go. By the time you make it to the end, you may come up with the perfect twist ending!
Having all of this detail down, including twists and the climax, will help you sow seeds as you write. You know what’s coming, so you can add little clues here and there that will only make sense once the reader gets to the end.
Admittedly, I’m a pantser. For my first novel, Lightborn, I had a dream that turned into my first chapter. I just sat down and started writing, and it seemed to flow so easily.
The same thing happened with my second novel, An Easy Target. At some point towards the end, I had to sit and think about where I was going, but the meat of the story was primarily unplanned.
That said, I’m currently working on the sequel to each, and I have to admit: I’m stuck.
So stuck, in fact, I haven’t written anything for a couple of months. Not good, I know!
And then, one day, the idea for another book came to me. It might end up being the sequel to An Easy Target at this point because I did something I’ve never done before: I planned it out.
Instead of writing the first chapter, I opened a google doc and began writing everything I knew. It started as an exploration of ideas, with snippets about little things I wanted to happen. And then it blossomed into a chapter by chapter guide of how I wanted the story to progress.
I have almost 40 chapters right now with bulleted lists and explanations of what would go down in each chapter and how the story progresses, almost like a storyboard for a movie.
If I think of something new while I’m working, I go back and add it in. The best part is, it’s not set in stone. I can easily change things at this point without having to re-write whole chapters.
So now, when I do sit down to write, I have a guide to help me along the way. I’m pretty excited to give it a try!
6. Set Up a Distraction-Free Workspace
If you’re serious about being a writer, you need to make your workspace your own. You need an area where you can go and write and not be bothered or distracted.
If possible, this should be in a separate room, but at the very least, it should be yours and yours alone. Don’t let your partner use it to work or let the kids do their homework. They’ll leave stuff behind, and you won’t see it as a creative space.
I have a board above my desk with all my ideas pinned up and inspirational pictures, etc., so I can look up and get in the right headspace.
I also have a copy of both of my books and a copy of The Martian because it’s one of my all-time favorites!
I do not have pictures of my dog or plants because they’re distracting to me -I kill every plant that comes into my house, so I opted for plastic so I wouldn’t be distracted watching them die.
One thing I do find helpful is to make a goal-list and to have the front and center. It’s just a small calendar with goals that I mark off daily. Seeing my progress day by day is a real confidence booster and super encouraging!
7. Work Out a Writing Schedule
Finding the time to write can often be the most challenging part. Since we don’t all have the luxury of writing full-time, it’s not easy to fit it in.
Working out a writing schedule will help you progress and keep the creative juices flowing. It will also help to hold you accountable and maybe encourage you to turn off Netflix.
The key to setting up a writing schedule is to make it realistic. Don’t expect to sit and write for three hours every night after the kids have gone to bed.
After a long day, it’s ok to want to watch a movie and fall asleep early.
That said, taking the time to write is essential, and setting aside just 30-60 minutes, at least four times a week, would be a great place to start.
Check out my post on how to set up a daily writing schedule for more.
8. Write a Rough First Draft
If you’ve already written out guidelines for the story, including a chapter by chapter breakdown, you more or less have your first draft ready to go.
From that point, all you need to do is fill in the details.
Just remember that this is a rough draft - it shouldn’t be perfect, and it shouldn’t be polished.
I think a lot of writers struggle with their drafting because they expect it to be perfect from the start. But if you go in knowing it will be full of errors and plot holes (which it likely will be), then you won’t feel too much pressure.
9. Fill In Details and Polish the Writing in the Second Draft
Now is the time to be more careful with your words and to polish your writing. After the outline and the first rough draft, you should be able to read through your story and start to perfect it.
I like to go through chapters one at a time, reading it in full before going back and re-reading while editing. Reading it first will give you a great idea of how the story is flowing and if anything seems off.
Highlight any parts that need changing/tweaking and fix them on your second sweep.
Depending on the length of your chapters, you should be able to get through one or two in an hour.
10. Find Beta Readers and Collect Feedback
Feedback is the lifeblood of your book. I don’t know anyone that can write a story and put it out there without having someone read it through first.
I have a team of beta readers that I turn to for my work, and I happily accept their criticisms and suggestions.
It’s not about finding people to put your work down, but rather finding people to give you honest thoughts and opinions.
You need to know if something is confusing or complicated or just plain useless. But as the author, it’s not always easy to see.
I don’t always recommend using family and friends as beta readers, and here’s why:
- They might not feel comfortable giving you criticisms
- They might not like your specific genre, so their feedback will be slanted
- They may not feel like they can “no”
- Not everyone can give writing advice and feedback
- Not everyone can critique works of fiction like you need as an author
To further explain that last point, take movies as an example. How many bad movies have you seen where things haven’t made sense or have been poorly written? And how many people do you know that praised these movies?
Without sounding condescending, there are a lot of poorly written books out there that shouldn’t have made it to market - Fifty Shades of Grey being a prime example!
It’s very poorly written with repetitive dialogue - literally copy-pasted from two pages prior - and there’s no substance to the main character…at all.
Here are a few examples:
- “He won’t tell you because he probably doesn’t realize it himself, notwithstanding what I’ve said to him, but that’s Christian.”
- “Her eyes are brown, like bourbon, but flat.”
- “I must be the color of the communist manifesto.”
- “My inner goddess is beside herself, hopping from foot to foot.”
- “My inner goddess fist pumps the air above her chaise lounge.”
- “My inner goddess stirs from her five-day sulk.”
- “My inner goddess is doing the merengue with some salsa moves.”
Now, I’m not saying my work is the best out there, but I worked very hard to make it as good as it could be. And I hope that my beta readers would highlight such instances of repetitive or unnatural-sounding dialogue.

11. Make Revisions and Needed Edits
Once you have feedback, it’s time to make your edits.
This isn’t always easy because it can be hard to let things go. We’ve all heard the phrase “kill your darlings,” and it’s so relevant. They’re our darlings because we worked so hard on them.
But they’re not all winners.
However, you don’t have to address all the feedback and change whole chapters based on one or two reviews. Instead, listen to what they’re saying and try to understand where they’re coming from.
It might be that you need to add a single line somewhere to clarify a point or fill in a bit of dialogue to explain a particular plot line.
Don’t just delete your work because a beta reader says so! Look at the feedback and make edits where needed.
12. Edit, Edit, Edit
Editing is a necessary evil and a never-ending task. As an author looking to publish, you should be going over and over your work with a fine-tooth comb.
Again, there is no right or wrong way to edit a book. But, there are some ways to make it a little easier. These include:
- Read your book cover to cover. This should be done a few times over the course of reading and editing.
- Listen to your book with text-to-audio software. Hearing your work read aloud will help you to pick up on minor mistakes, and in some cases, the software will highlight the words as it reads.
- Search for and replace filler words such as “that,” “just,” or “really.” Certain filler words and “crutch” words are necessary and should be left in - especially if you want your dialogue to sound natural. But many can be taken out without affecting the work at all.
- Check your punctuation. Did you over-do it with exclamation points? Is all the dialogue in quotation marks?
- Run the story through multiple spelling and grammatical programs. If you’re serious about writing, I highly recommend purchasing a pro-plan to get access to all the editing features. I use Grammarly, but ProWritingAid is a great option too.
- Read over every line slowly. This will take a lot of time, but it will be worth it in the end!
- Format according to where/how you’re going to publish. KDP uses Kindle Create to make publishing super easy, but you can’t upload from a Pages file. Check the publishing information to see if you need Word or PDF.
- Don’t over-edit. It is possible to go too far, so you need to know when to stop.
13. Publish Your Book on Amazon’s KDP
People choose to self-publish for many reasons, and Amazon’s KDP is the best place to start. It’s free, easy to use, and gets your book out to millions of potential readers.
The best way to publish with KDP is to use Kindle Create, a free software you can use to format your novel. Upload that file, and you should be able to publish a Kindle and Paperback book.
If you’re interested in self-publishing, I’ve written a detailed blog post about How to Self-Publish on Amazon, including images and information on book covers.
Final Thoughts
Sometimes putting pen to paper - or fingers to keys - is the hardest part. Even if you have a solid idea, it’s not always so straightforward when it comes to bringing it to life.
The good news is: writing is personal and subjective. Nobody can tell you you’re doing it wrong, and nobody has all the answers.
This article is a list of things that I find helpful. Maybe they won’t all work for you, but it’s a good place to start!
Check out my series - Novel Writing For Beginners - Part One, Two, and Three for more helpful tips and tricks for writing a novel.