It’s no secret that Amazon is the largest online bookstore in the world. It’s the largest online seller of everything, in fact, and the market is undeniably broad. This is why so many self-published authors look to Amazon’s Kindle Direct Publishing (KDP) to release their work.
The good news is that self-publishing on Amazon is a breeze. Between their Kindle Create software - which is totally free to use - and their step-by-step publishing guide, you can have your finished manuscript uploaded in a matter of minutes.
Steps of Self-Publishing
When it comes to self-publishing, it can be both liberating and lonely. Where a traditionally published author will have the support of a literary agent, an editor, and a publishing house, those of us that choose to self-publish have to wear each of those hats and more.
It is a long road to start and finish a manuscript, and with self-publishing, the real work begins at the end of the story.
1. Write a Book
It may seem silly to say, but in order to self-publish, you need to write a book. It can be anything from a fantasy novel to a cookbook, but you need to sit down and put in the work. We will be focusing on novel writing, but many of the steps will be the same for most ebooks.
Novel writing for beginners can be a daunting process, so check out my blog post for some tips and tricks.
For some, outlining the story and detailing plot-points is an excellent way to prepare. Being able to follow a plan can help prevent writer’s block and allow an author to move back and forth within the book with ease. Similarly, it will ensure consistency. Having character profiles and a clear timeline of events is a great way of keeping track and preventing continuity errors.
But the truth is, there’s no easy way to write a novel. It takes time and passion, but you will finish if you’re willing to put in the work.
2. Edit and Polish
It can’t be said enough: edit your work thoroughly and work on your manuscript until it is as perfect as possible. There is still some unjustified stigma surrounding self-published books, which stems from poorly edited books being uploaded daily.
Self-publishing is a double-edged sword in that regard. Though it is excellent for those of us who take it seriously and genuinely aim to make our work great, it has opened the door to lesser writers who upload their work without the proper due diligence.
I know that editors can cost a lot of money. Some will charge per hour, and some will charge per word. But the fact is, an 80,000+ manuscript can cost anywhere from a few hundred to a couple thousand to have professionally edited. This is out of reach for many beginner authors.
In lieu of paying for an editor, give your book to as many friends and family members as possible. Have them read and check for errors, as well as acting as beta readers. They can find plot-holes you may have missed while also noticing small typos that your trained eyes will overlook.
3. Create Your Artwork
This can be the most fun or the most frustrating part of trying to finish your book. Without a team of artists and photographers in your corner, your resources are limited. Finding the right kind of image online can be a struggle, and it will often cost a lot of money to purchase said images.
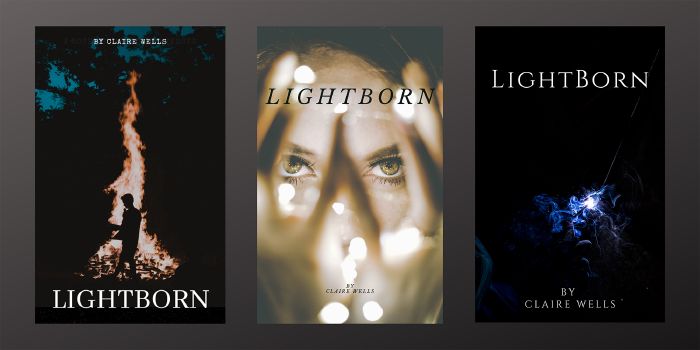
For my first book, Lightborn, I went through a lengthy process of searching for images and designing different covers. It took some time to develop something I loved, but it was well worth the effort when I held that first copy in my hands.
For some, investing in cover artists is well worth the money. They can be found online on Etsy or Upwork and often have examples for authors to look through. Some will charge a flat-fee where others will charge per mock-up. Using such artists will ensure unique work and will make your final product look professional.
Another great resource is to look through websites like Unsplash and Pexels. Both have royalty-free and premium images that can be used. Always check the fine print to ensure the images can be used for book covers before committing to anything. In some instances, you will need to credit the creator.
Once you have your image, a great resource to use for creating a book cover for free is Canva. Though they have premium templates that you can pay for, their collection of free materials is substantial, and you can create everything from a book cover to social media posts.
When creating your book cover, be sure to check the size guide given by Amazon, so you know it will be a large enough file for their program.
4. Format Your Manuscript
As mentioned above, KDP has a free software available for both Mac and PC users. Kindle Create is free to download, and you can then upload your finished manuscript and have it formatted for you.
To use Kindle Create, you will need to start with a Word Document. For Mac users, it is possible to save your files as a Word Doc by clicking “export” under the File Menu.
Before you start, however, you need to be sure that the file is pre-formated. By that, I mean you need to ensure you have clear breaks between each chapter. This can be achieved by selecting “Page Break.” The program will move the cursor to the next page, creating a distinct break that Kindle Create will register.
Once you upload your manuscript, the program will run through and find these breaks, making each chapter separate, and it will offer headings that you can edit. Go through every page to ensure that the file has uploaded correctly.
However, don’t get too caught up on how it looks in the browser. Most e-readers use reflowable type. This means the text will move depending on the size of the screen or font. Where one chapter may end on page ten in your e-reader, it could be page 15 for another.
Front and Back Matter
Kindle Create offers several front and back matter pages. These include content, acknowledgements, copyright, prologue, and afterword (to name a few). Each page can be chosen - or not chosen - by the author, and a form is available to ensure it is formatted correctly.
They also offer pages for an author bio and information about other works. This is great for ebooks especially as you can include a link to your other books through Amazon.
How to Upload to Kindle Direct Publishing
Once you have your finished manuscript and cover art ready to go, uploading to Amazon’s KDP is actually super easy. You will need to create an account, including providing contact and payment information - it is free to upload to KDP, and the payment information is for you to receive royalties.
Step One - Set Up an Account
Once your account is set up, you will need to select what kind of book you will be uploading. If you want to publish both an ebook and a print book, these will need to be done separately.
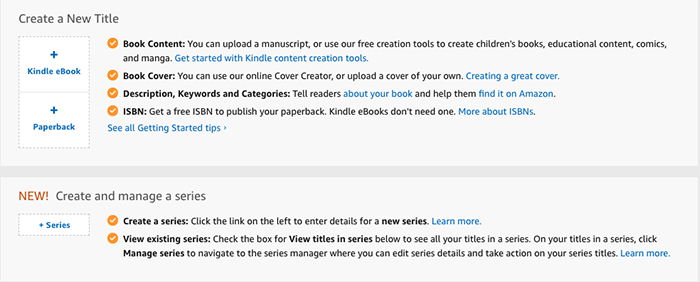
If you think you will be publishing a series, you can select this from the beginning. Or you can change a previously published book further down the line.
Step Two - Fill in the Forms
After choosing a Kindle, Paperback, or Series, you will need to fill in a series of three forms. These will be asking everything from your work title to a blurb or description for the Amazon page.
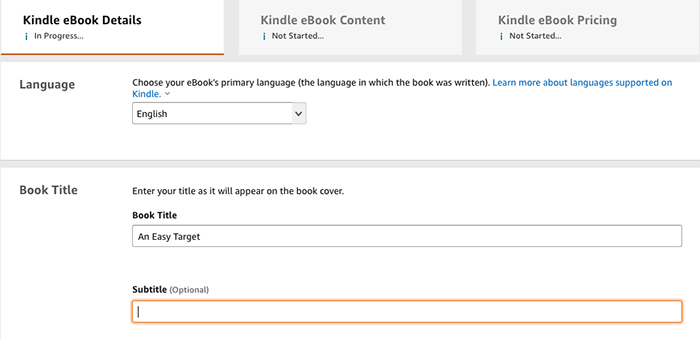
Each form is clearly laid out and easy to follow. They offer examples and will highlight anything that has been missed before you can continue. You can opt to have your book available immediately or for pre-order.
As you progress, you will see that each selection has been completed so that you can keep track if you choose to save and return later.
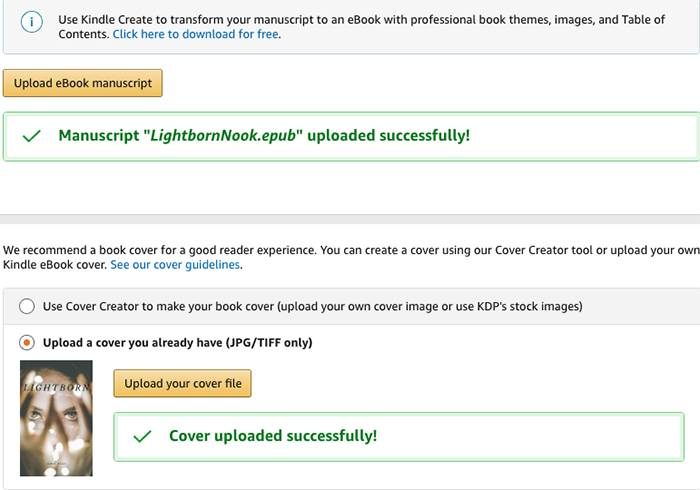
Step Three - Upload Your Manuscript
Upload your manuscript and cover art. If you have used Kindle Create, the finished published file can be uploaded directly, and it will be perfectly formatted for ebook distribution. If you choose to upload a PDF instead, be very careful to check each page in the Previewer to ensure nothing has been altered.
For an ebook, you can simply upload the cover art file you have which will need to be either JPEG or TIFF files. For paperbacks, KDP has a Cover Creator that you can upload the artwork into, and use a template to create a book jacket. This will include a free ISBN and blurb for the back.
KDP will let you know when everything has been uploaded successfully, and you may then preview your book. This will show a faux-e-reader and how your book will look on such screens. You can click through the pages to check everything from the cover to the back matter.
Step Four - Submit Your Work to Amazon
If you have double-checked the information and are happy with the preview, you can then submit your work to Amazon. They will inform you if it has been successful and send an email notifying you that it can take up to 72 hours for your book to become available. They will need to review it before allowing it to be made public.
For print versions, it is possible to order a proof copy before you commit to releasing it to the public.
Once your book has been reviewed and released on Amazon, you can also order Author Copies - if you published a paperback version. This will be sent to you at cost, and you will likely also need to pay for shipping. The printing cost for my books, which are both around 97,000 words was between $4 and $6.
Step Five - Celebrate
Congratulations! You have self-published a book! That’s quite an achievement. Unfortunately, there is still work to be done. Marketing is the next crucial step in the self-publishing journey, and there’s a lot to cover.
I’ll be covering How to Market a Self-Published Book in the next couple of weeks. So check back for lots of tips and tricks for getting your book sold!